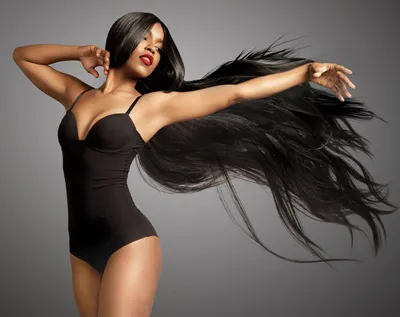
Celebrity Prom HairStyle: Christina Aguilera
Introduction
Christina A or Xtina, as many of her fans refer to her, was born on December 18, 1980 in Staten Island, New York to Irish and Ecuadorian parents. Her musical talents were rooted with her mother who was a violinist/pianist while her father was a military man. It's been reported that from the time she was a small child, Christina was a natural talent with an instant affinity for music and singing. Not only did she learn how to sing at a very early age, she performed at parties for family and friends. Because of her exceptional natural talent in music, she was selected as a national anthem performer at professional sporting events in the area.
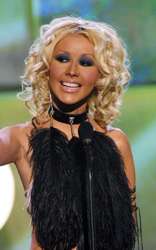
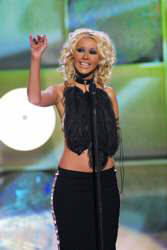
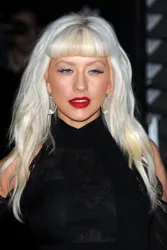
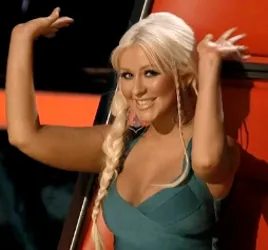
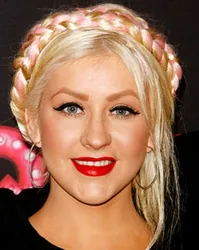
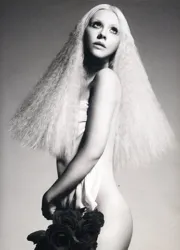
Christina became a sizzling hot singing sensation with her Genie In A Bottle while still in her teens. After the amazing success of her debut album Christina went wild with her image. Over the span of the last 4 years she has morphed through a range of hairstyles and colors designed to compliment her dizzying array of images from dirty rock girl to glam fashionista. At the 2003 American Music Awards Christina mixed it up with a range of styles including a very soft, feminine curly version which showcased her soft, girly girl side. Ironically Christina's soft cascading curls were right in style in 2003 and still in style for 2010. Her hairstyle and would work fabulously for any Prom fashion trends including leather, lace, velvet, feathers or gowns other exotic trims. If you'd like to recreate Christina's look above, follow the steps listed below for a similar hairstyle.
Getting Started Notes
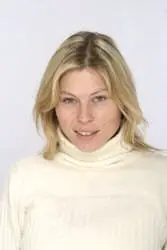
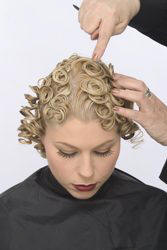
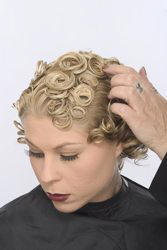
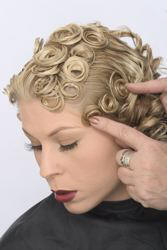
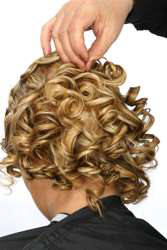
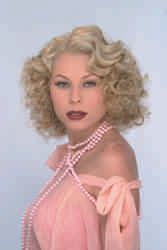
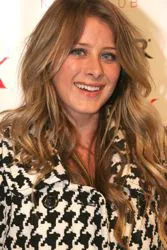
The model for this piece was Danielle (shown to the side) who has baby fine hair with a slight bend. Her tresses barely brush her shoulder tops. Like Christina she has chemically enhanced light blonde hair with a slight shadow of darker roots. Her face shape is oval combined with a squared jaw line. She has gorgeous eyes, which are a focal point for any hairstyle she wears. In order to create a spectacular transformation to Christina's famous AMA curled hair appearance, celebrity stylist Barbara Lhotan meticulously applied pin curls to her entire head. A similar hairstyle, although looser, may be created with hot rollers. For a classic look like Christina's 50s style curls, it's best to use pin curls and create the luscious curls the old fashioned way. Creating Style At HomeWhen created correctly, this style may require the assistance of a skilled hairdresser. Why? A truly great pin curl style involves lots of precision to achieve uniform curls which flow in harmony.
Keep in mind when crafted properly, the style can take some time to finish. If you decide to re-create the style at home be sure to have several practice runs before the night of your big hair event.
More On Pin CurlsPin curls are one of the most basic type of curls which have been around for years.
This popular type of curl cycles back into popularity on a regular basis, as witnessed by Christina's hairstyle. Although pin curls can be used to curl an entire head of hair, like used in Christina's style, they are more often used to curl smaller sections of a hairstyle. Pin curls are often used as "fill in" curls for an overall look. Fill in curls are used in the areas which frame the face and run throughout the crown. They are ideal for creating fluffy bang or for just the ends of the hair to unify an overall curl. Pin curls are always created as a "wet set" on damp hair (newly shampooed or misted damp with a water bottle) and can be combined with other types of curls for a unique set. Pin curls are either forward or reverse which basically means they are either directed clockwise or counterclockwise. Forward pin curls on the right side of the head are formed in a counterclockwise direction. Forward curls on the left side of the head are formed in a clockwise direction. This is important to note in order to create a well balanced final hairstyle. Best Styling Tips
This classic pin curl style works best for hair that is shoulder length or longer, medium in texture and either straight or pre-straightened. Regardless of your hair's texture, type or actual length, it's important to start with strands that are damp and dressed properly with the necessary styling products to help hold the finished set.
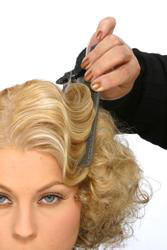
Although Christina's style was designed with a short center part along with off-the-face side sweeps of hair to show off her beautiful oval shaped face and gorgeous eyes, a variety of different parts and bangs could easily be incorporated into a customized version. This style could also be worn without either. Before you start the pin curling process make sure you have all the proper tools. Pin curl tools include plenty of hairpins, a good brush and comb and a spray bottle with water to make sure the hair remains moist. If you wish to add hair accessories be sure you have them ready to be added to the style at the end. Remember to use good styling sprays or similar products to give hair instant texture and stylability. Instructions - Steps To CreateStart by carefully separating hair into equal sections approximately 1" in size. Depending on your type or texture of hair, use the appropriate amount of styling products as you work on each section of hair. Make sure that the finished set is not too soft and will hold the curls tightly. To achieve the same uniformity of curl on both sides of the head, the technique used to form a curl on the right side of the head must be mechanically different from that used on the left side. This is because you use the same hand to form curls on both sides of the head. If you are right-handed, you always use your right hand. If you are left-handed use your left hand.
The procedures described in the following sections are for right-handed people. If you're left-handed, you should use the procedure given for the right side of the head on the left side and vice versa. Counterclockwise curls are formed away from your body position, whereas clockwise curls are formed toward your body position. Pin curls have the advantage of being fairly easy to create after a little practice. Take your time and be patient. Steps For Creating A Forward Clockwise CurlStarting on the left side of of your head, create a series of Clockwise Pin Curls which carefully extend from the front of the hairline back towards the nape of the neck. To recreate the same type of pin curls complete the following steps:
Note: Be sure not to twist the hair as you wind it. Make sure that the ends are tucked inside of the curl, and curl is pinned right on top of it natural hair base. Do not pin the curl away from the base of the curl.
Note: Keep in mind that many people prefer the double prong clips for sleeping comfort. Under no circumstance should you use bobby pins which will form dents in the hair and may add to overall frizz patterns. Steps For Creating A Forward Counterclockwise CurlOnce you have carefully created pin curls on the left side of your head, create a series of Counterclockwise Pin Curls that carefully extend from the front of the hairline back towards the nape of the neck on the right side. To recreate the same type of pin curls complete the following steps:
Removing Pin Curls
Summary
From certain angles it's amazing how much Danielle looks like Christina.
For the final photo shoot, Danielle was dressed in the type of style Christina has been known to favor and would easily translate to a Prom style. This is such a classic hairstyle it looks good with a wide range of hair hues. The finished curly style would look spectacular with a high glitter Swarovski or Austrian Crystal hair clip, barrette or hairpins to add instant shimmer. Christina's curled style is very versatile and can work with a variety of prom dress styles from total glam to more rocker chic. Adjust the curls by wearing them as shown or pinned up, for a slightly different look. With the current trending of curls and waves as demonstrated by Christina, don't be surprised to see pin curls making a huge comeback as women aspire to copy her retro style. Social Media Network Information
Please follow me on Twitter at: http://Twitter.com/HairBoutique. I look forward to meeting new people Thank you for visiting us at The HairBoutique Blog and for leaving your comments. They are very much appreciated. We apologize in advance but must remove any direct advertisements or solicitations. Credits For This ArticleModel: Danielle Stylist: Barbara Lhotan Photographer: Eric Von Lockhart This article may not be copied in whole or part without express written permission from HairBoutique.com.
| ||||||||||||||||||||||||||||||||||||
| If you want to talk more about this or other hair care articles on HairBoutique.com or anywhere else, please post a message on HairBoutique.com's Hair Talk Forums.
|
Social Media Network Information
Please follow us on Twitter at: https://Twitter.com/HairBoutique. I look forward to meeting new people from all walks of Twitter and learning from their Tweets.


