 One of the braids that I get the most questions about is the Fishtail braid. This is also called The Herringbone braid because it looks very similar to a tight Herringbone pattern.
 For more information on Jones' book you can read my
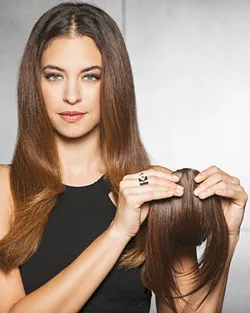
 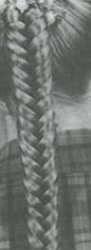 The steps are basically the same. Although the Fishtail ponytail looks tricky, it consists of a simple two strand braid that is created starting at the top of the base of a ponytail.
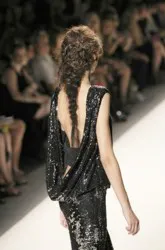
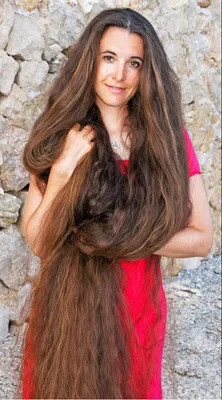
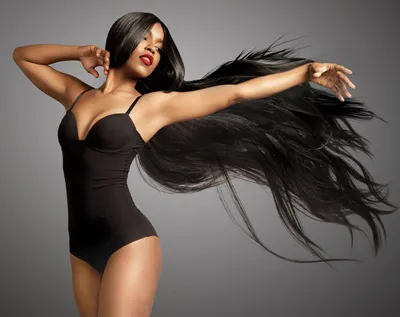
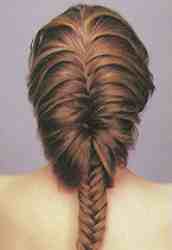 The photo to the side is taken directly from Easy Step-by-Step Hairstyles and demonstrates a full fishtail braid that starts at the front of the hairline and ends with a long herring bone braid that flows out from the main braid at the nape of the neck.
 The hair should be braided close to the scalp until about halfway from the hairline. Then the braid should be created at least 6 inches away from the scalp. This will give the braid a very soft and draped look.
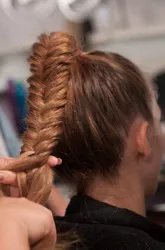


Wanna talk?
HairTalk® is the place for you!

Copyright 1997-2025, hairboutique.com, All Rights Reserved.

Introduction
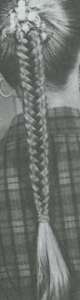
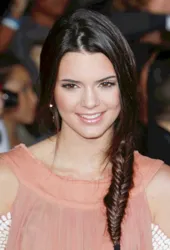
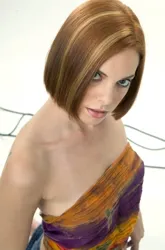
It is a stunning braid that can be created on a ponytail (as shown in the photo) or it can be created starting at the front of the hairline as a full braid (shown at the end of this article). Some of the best instructions that I have ever found with detailed diagrams on how to do a good Fishtail ponytail or braid is in the book: Braids & Updos Made Easy by Jamie Rines Jones. The photo above is taken directly from Jones' great book which includes some of the best line drawings that I have found on many different braids and updos. Jones recommends that you learn how to successfully create fishtail braids on ponytails before you try the full blown braid from the hairline. I do have to warn you that I have never been able to really do a great job of this braid on my own. I have managed to do some great fishtail ponytails that were pulled to the side of my head, but when I try to do the braid on a ponytail at the back of my head I don't have as much luck. Also, I have not had very good luck with the full blown braid. However, Hair Boutique hairstylist, Shelley Pryor has created both the full fishtail, two strand braid as well as the full fishtail ponytail on me with stunning results. The Hair Boutique makes Jamie's book available to you through our affiliation with Amazon.com.
At the bottom of the book review page you can also buy this great book by clicking on the Buy The Book link. The Fishtail braid and/or ponytail may look complicated to create but in reality it is fairly simple. One of the great things about the Fishtail Braid is that it can be worn as a full braided pontytail or it can be used as an accent style with other braids. Instructions For Fishtail Ponytail
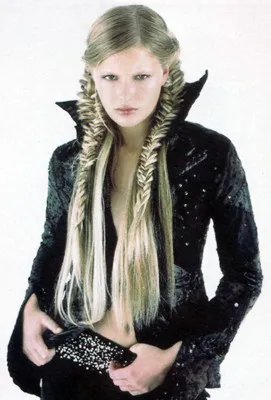
One hint is to try to keep all the sections equal in thickness and to pull each strand tightly to give the uniform herringbone appearance. Step One: Start by pulling all hair back into a ponytail. It should be noted that this braid works best on dry hair that is medium to very long in length and is not layered. Step Two: Divide the ponytail into two equal sections of hair. Take a small (approximately 1 inch section) from underneath the left section of hair and cross it over the right section of hair. Step Three: While holding the ponytail securely with your left thumb and allow the right side of your hand to be free and then take a small section (same approximate size as the previous section) from underneath the right side. Step Four: Cross the section from underneath the right over to the left side of your hair. While holding the right side securely with your right thumb, continue steps 2-4 until you reach the end of the ponytail. Secure the remaining "tail hair" with a "hair friendly" elastic band. The braid can be adorned with gorgeous hair jewels such as rhinestone hair pins or other rhinestone jewelry. It can aslo be worn "as is". This style is easy, simple, fast and the results are stunning. Allow plenty of "tail" at the end of the fishtail braid or else there is a danger that the elastic band may work its way out of place and the braid may loosen or fall out. This hair style looks especially stunning on thick hair that has lots of contrasting colors that are emphasized with the tied hair pieces. The style can be worn in a variety of modified ways including wearing bangs or side tendrils. Full Fishtail BraidTo create a full fishtail, herringbone or two strand braid, follow the same steps creating a two strand over braid, but start at the front of the hair in a triangle section.
Unfortunately, as of 12/99, this book is out of print and not currently available. You can still order Mary Beth's Twists & Braids Made Easier but this book is heavier on variations of hair twists and lighter on braids. While there are 17 different patterns, none are specifically Fishtail braids.
To create a full braid, follow the same steps for creating a two strand over braid described above, but start at the front of the hair in a triangle section. One of the great things about the fishtail braid is that depending on how you position your hands, the braid will change the way that it looks from tight against the head to loose and full. To get the soft and full look that is shown above and to the right the hands need to be held as much as 6 inches away from the head as the braid is being done.
As I mentioned above, I have never been able to re-create this look on my own hair. However, my stylist was able to get a very soft full look by braiding the last part of the braid on the scalp holding her hand far from my head. You have the option to finish off the braid with the tight herringbone braid or you can actually leave the hair loose. Another option is to finish with a tight herringbone braid and then tuck it up and under the hair. The tucked braid should be pinned securely. This gives the hair a type of soft updo look that is very elegant and romantic. |
| If you want to talk more about this or other hair care articles on HairBoutique.com or anywhere else, please post a message on HairBoutique.com's Hair Talk Forums.
|
Please follow us on Twitter at: https://Twitter.com/HairBoutique. I look forward to meeting new people from all walks of Twitter and learning from their Tweets.

