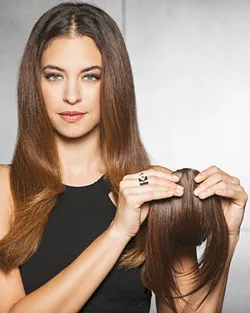
Hair Zigs & Zags: Mastering Zig Zag Parts
Introduction
Not only do zig zags look hot, they When in doubt practice zig zagging on a willing pal and then go for your own look. Steps For Creating Zig Zags
Zig zag parts can work on any hair texture but they are easiest to create on thin to medium hair that is straight. Wavy and curly hair can be more of a challenge, but can be parted into zig zag looks with some extra work. It may not be as easy the very first time but like any work of art, experimenting can turn you into a pro in short order. Follow the steps below to begin creating your own zig zag parts. Start with one part and work your way up to multiple parts.
STEP 1 - Brush or comb your hair to make sure that all knots and tangles are removed. You may want to add a few drops of jojoba oil to the palms of your hands and smooth over your head to control dry or flyaway strands. STEP 2 - Brush your hair like you are planning to form a ponytail. Place one hand at the crown to hold the hair in place and away from your face.
STEP 4 - Slowly slide the comb or brush tail back and forth from side to side in a zig zag fashion from the front of your head to the crown area. If you prefer, you can zigzag only a small distance to create a small part. Or you can pull the zig zag all the way from the front of your face to the back of your crown section. The choice is yours. STEP 5 - When you reach the end of where you want the zig zag parts to end than place your forefinger close to the comb tail and pull both your hand and the comb down your head in the exact opposite direction. If you wish to use color you can apply color using a spray-on color. Hold the spray 6-8 inches from your hair and then spray over the entire stencil opening. Maniac Panic colors can be applied to the stencil opening with a paintbrush. Remember that if your hair is naturally dark that certain colors will be less visible than other. Apply the Maniac Panic, decorate with tiny rhinestones or colored glitter and then set the design with light hair spray. If you want to add extra hair shimmer add a tiny drop of shine product to the palms of your hands and then glide carefully over the sections of hair that have been stenciled. Make Your Own Zig Zag Pattern Use any zig zag design that you like keeping in mind your level of experience with zig zagging. Most beginners might consider starting with simple designs like a short zig zag that is easier to apply. As you evolve you can experiment with different zig zag patterns and lengths. Eventually you should be able to handle multiple zig zag parts all over your head. Easy Way Out
This tool costs $14.95 plus shipping and handling. So if you can learn to zig zag with practice you are ahead of the game. Some online stores will give you freebies with the $14.95. There are several places on the web that sell this tool. Shop for best prices or look for special gimme offers like free stencils (set of 4 worth an additional $4.95 which means you are getting the product for a good savings) or special sale offers. I found several while surfing for the original kit. If you are going to add hair jewels to highlight your zig zag parts (large jeweled butterflies are definitely back for 2001), fresh flowers or gorgeous hair sticks, place them in your style last, after you have applied any color, glitter, sprays or gels. Social Media Network InformationPlease follow me on Twitter at: http://Twitter.com/HairBoutique. I look forward to meeting new Thank you for visiting us at The HairBoutique Blog and for leaving your comments. They are very much appreciated. We apologize in advance but must remove any direct advertisements or solicitations. - Revised Publication Date: 05/03/10 |
| If you want to talk more about this or other hair care articles on HairBoutique.com or anywhere else, please post a message on HairBoutique.com's Hair Talk Forums.
|
Social Media Network Information
Please follow us on Twitter at: https://Twitter.com/HairBoutique. I look forward to meeting new people from all walks of Twitter and learning from their Tweets.


 Yes you can buy a stencil (see below) that helps you learn to do zig zag parts, but you can also learn to do it with a little practice, a tail or brush with a pointed "tail" and a good large 2 way mirror. (Photo: Goldwell - Pearl capped silver hairpin in the
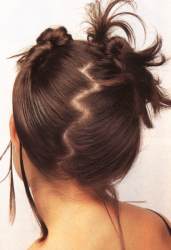 Many of the hairstylists I talked to advised me to learn to do zig zags on "aged hair". This means hair that is not freshly shampooed and potentially flyaway. (Photo courtesy of Barbara Lhotan, Inspire Publications. Taken from
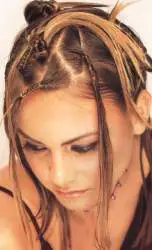 In order to maintain better control over your ultimate zig zags, make a series of
 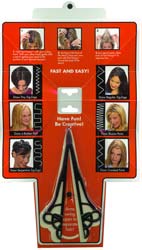 OK, if you tried to zig zag your hair and are still at a loss you can take the easy way out and order the


